所谓的动态网页就是会根据某些变量,渲染出不同的页面,曾经的 Web 后端开发主要就是通过服务端脚本生成 HTML 文档给用户,但是这已经过时了,现在流行前后端分离的架构,后端只提供 API,前端通过调用后端 API 获取数据,因为现在前端可以做很多事,是门大学问,坑也非常多,这里就不说了,本文主要介绍已经过时的 Web 开发的基础, CGI 协议
嗯,我在胡说八道
不知道该写啥,随便看个例子吧
cgi 脚本一般通过 HTTP Server 调用,所以我先装个 httpd
yum install -y httpd # centos 大法好 |
httpd 默认把 cgi 脚本放在 /var/www/cgi-bin
#!/usr/bin/env python |
来,试一试
chmod +x test.py # 加个执行权限,当前在 cgi-bin 目录下 |
说实话,第一次写这个的时候感觉 low 到爆
cgi 模块
如果需要传递参数,提交表单啊 啥的就需要 cgi 模块来搞定了
传递参数
先看看怎么用吧
#!/usr/bin/env python |
发送带参数的请求试试
curl 'localhost/cgi-bin/cgi-module.py?name=AnyISalIn&email=anyisalin@gmail.com' |
通过传递的参数渲染页面
可以通过 getvalue 方法来获取参数的值
#!/usr/bin/env python |
测试,多个参数之前用 & 符号分隔
curl 'localhost/cgi-bin/args2.py?name=aaa&url=http://anyisalin.github.io' |
GET 表单测试
文档路径为 /var/www/html/form1.html
<form action="/cgi-bin/args2.py" method="GET"> |
输入参数
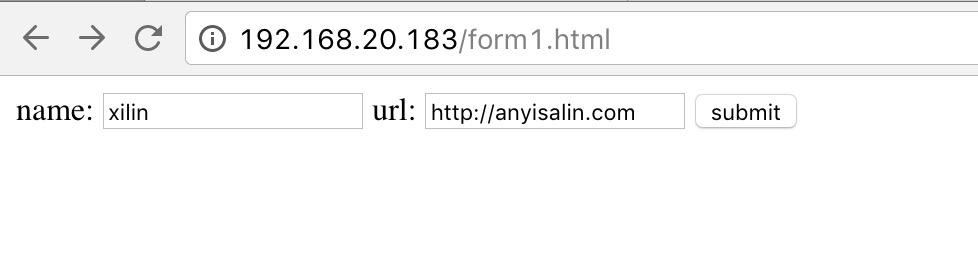
点击 submit

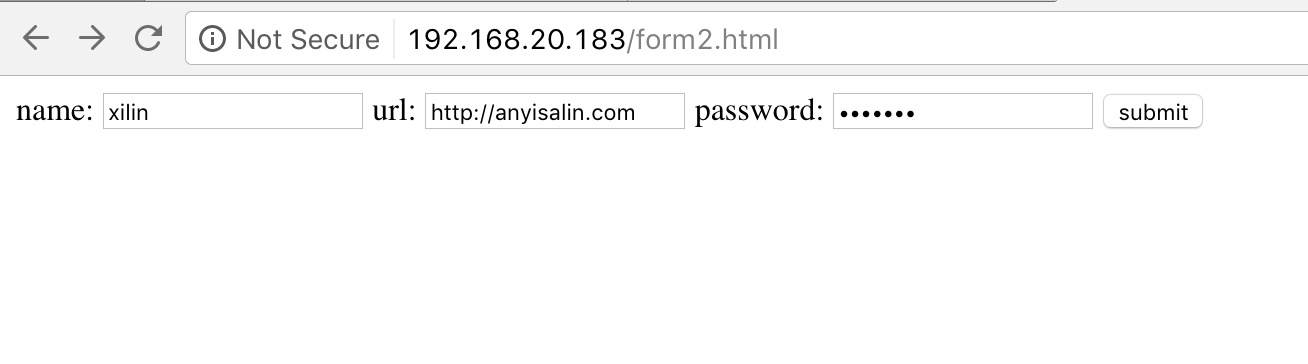
POST 表单测试
通过 POST 传递数据更加的安全,密码之类的字段不会明文显示在请求 url 上
文档路径为 /var/www/html/form2.html
<form action="/cgi-bin/args3.py" method="POST"> |
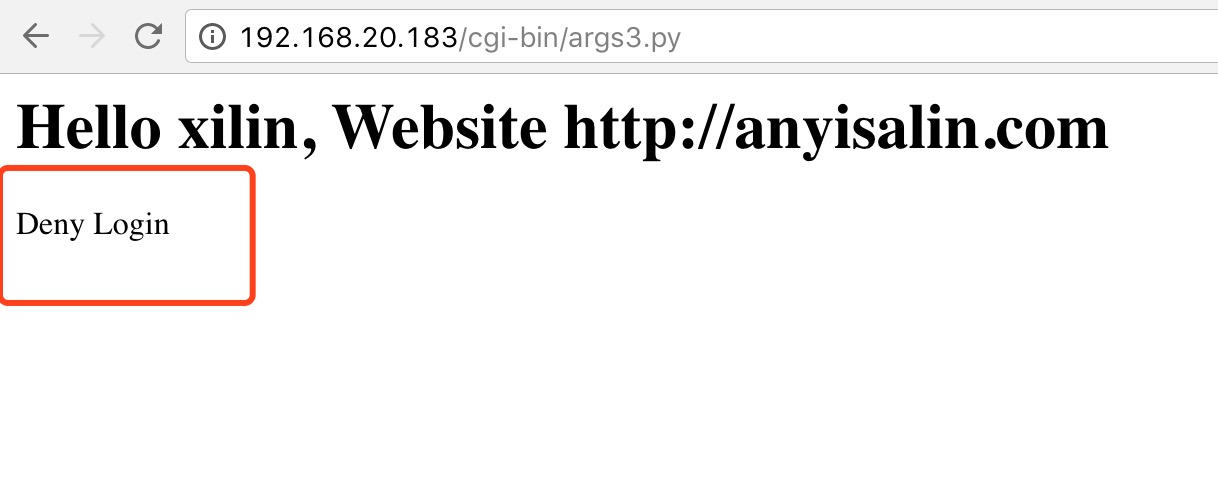
建一个 args3.py 的 cgi 脚本,简单的登录支持
#!/usr/bin/env python |
故意输错密码
拒绝登录
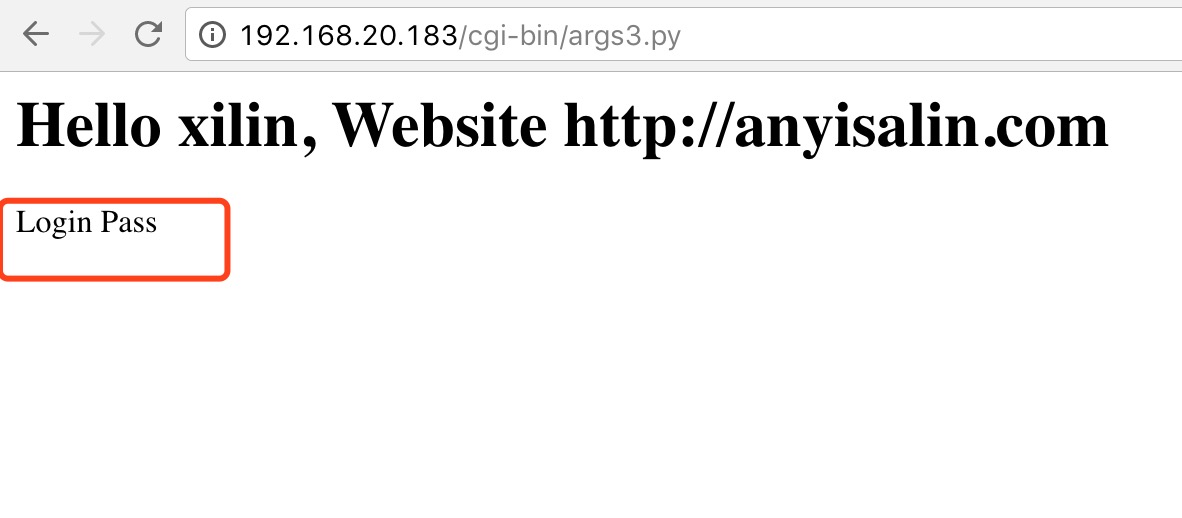
密码输入正确,登录成功
上传文件
还是通过表单的方式上传文件
文档路径为 /var/www/html/form3.html
<form enctype="multipart/form-data" action="/cgi-bin/upfile.py" method="POST"> |
建一个 upload 目录来存上传的文件,并设置所有者为 apache 用户
pwd |
编写一个 upfile.py 的 cgi 脚本
#!/usr/bin/env python |
选择文件
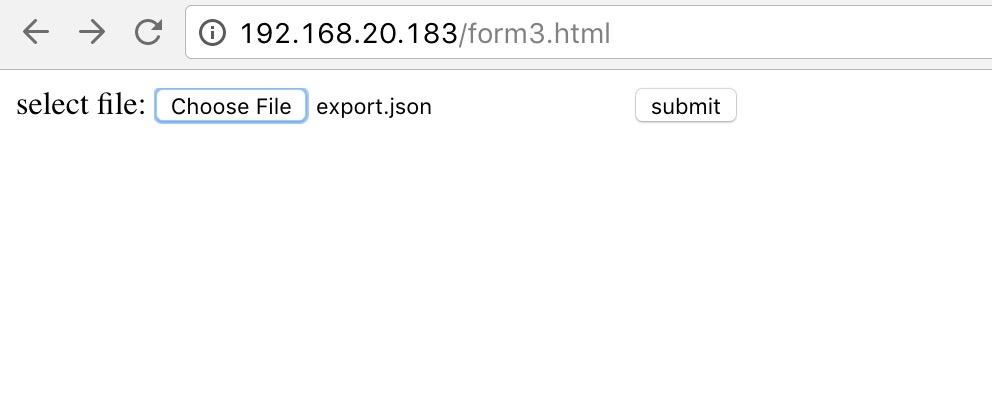
点击上传
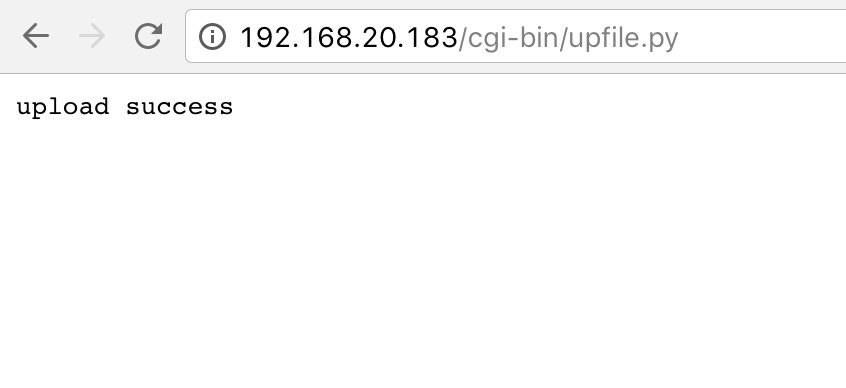
查看 upload 目录
ls upload/ |
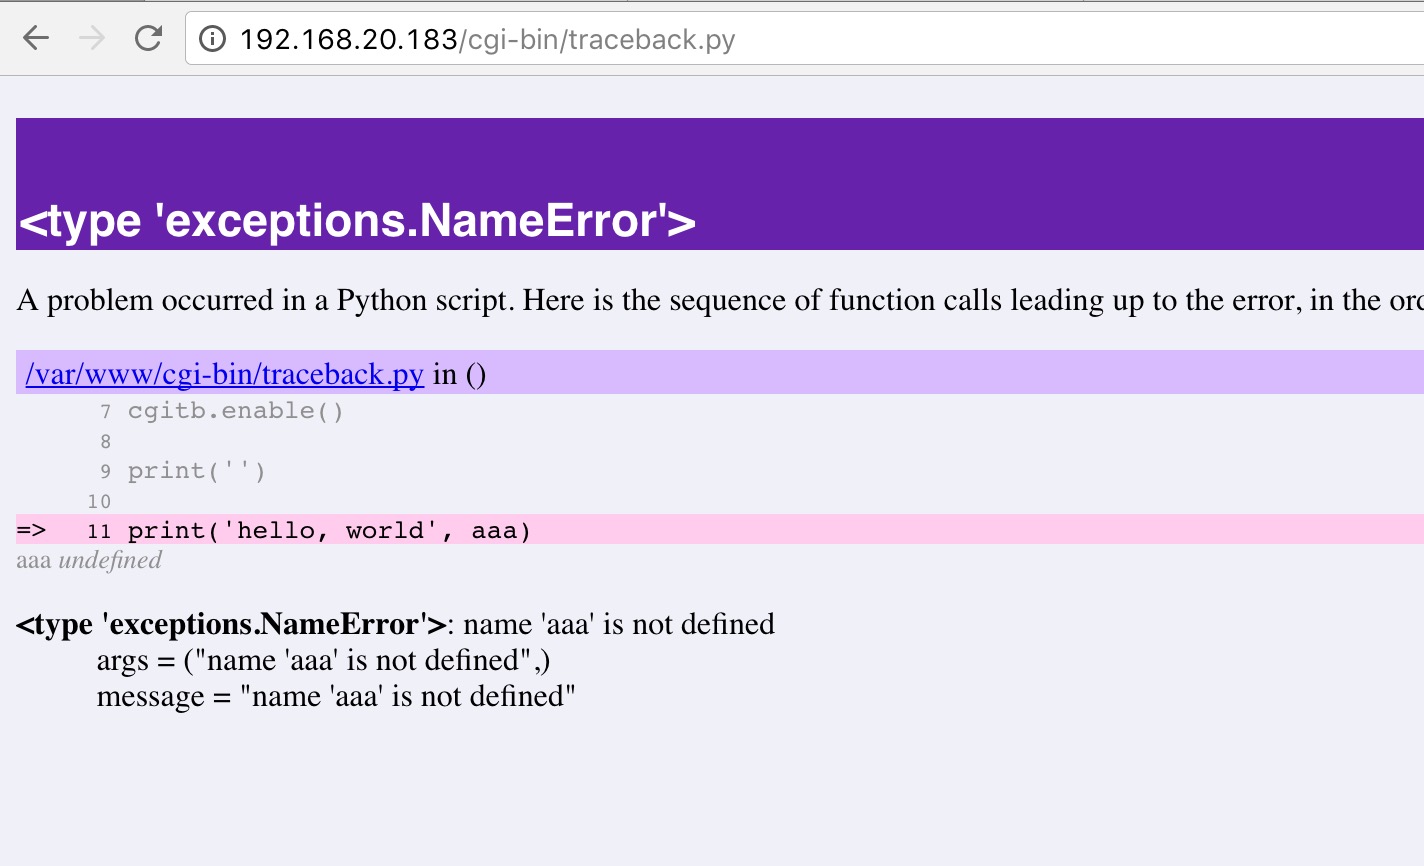
异常捕获
如果我们的 cgi 脚本运行出错,一般情况下 HTTP Server 会抛出 500 错误,但是我们可能希望 HTTP Server 能够准确的抛出异常,供我们排错,这时候就要用到 cgitb 这个模块了
#!/usr/bin/env python |
请求一下页面试试
CGI 的一些问题
有几个比较关键的问题
- 所有脚本都必须有执行权限
- 不同操作系统的换行符可能会有问题
- 要使用特定的扩展名去访问
- cgi 脚本中必须指定解释器
- 性能不行
在 Python 中解决这些问题可能就需要用到 WSGI 了
参考资料: